
This page covers how to install the Stardew Valley mod “Ginger Island Extra Locations – Redux” and everything you need to clear it, all on one page.
Story events are not spoiled. Only the information you need to progress is included.
Everything here is based on what I verified by actually clearing the mod.
目次
- What is GI Extra Locations Redux?
- How to install GI Extra Locations Redux
- Quick walkthrough
- Progression chart
- New character “Javi”: schedule, events, and gifts
- New areas
- Temple altars (5 bundles)
- Aquarium bundles
- Underwater area and how to catch deep sea fish
- Sunken ship hidden room (Ancient key)
- Extinct dragon’s lair
- Mystery shop and crafted items
- Bug: dust recipes can’t be learned (and the fix)
- New farm animals and animal products
- New fish
- Cooking
- Artifacts and the museum
- Config options
- Bugs and notes (Ver.1.5.1)
- Commands to save time and work around bugs
- My impressions
- Summary
What is GI Extra Locations Redux?
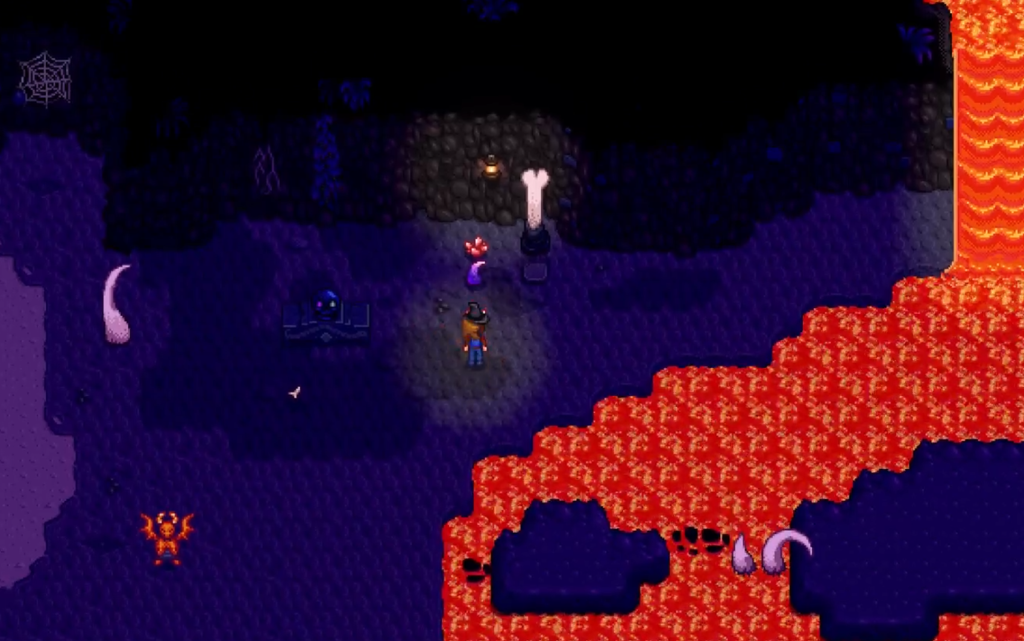
An expansion mod that adds new areas, a new character, bundles, fish, and farm animals to Ginger Island.
It is made by mistyspring and is a remake of the older mod “Ginger Island Extra Locations”.
The story takes about 2 hours.
Perfection is, in my opinion, impossible through normal play because of the number of bugs.
If you use the commands on this page, you can finish everything in about 5 hours.
| Added content | Count |
|---|---|
| New areas | 15 |
| New characters | 1 |
| Bundles | 10 |
| Fish | 18 |
| Crab pot creatures | 7 |
| Farm animals | 18 |
| Recipes (cooking) | 19 |
| Artifacts | 14 |
| Equipment / tools | 3 |
The mod’s dishes, animal products (shipping), and Javi are added to the Perfection tracker, so installing it on a save that already has Perfection will lower your completion rate.
What counts toward Perfection
- Items shipped
- Artifacts
- Crafting
- Cooking
The mod’s fish were not added to the fishing collection.
You can also exclude these from the tracker in the config (see below).
How to install GI Extra Locations Redux
https://www.nexusmods.com/stardewvalley/mods/42648
Installation works the same as most other mods.
Install the main mod and all of its requirements.
| Mod | Required | Download |
|---|---|---|
| SMAPI | Yes | https://www.nexusmods.com/stardewvalley/mods/2400 |
| Content Patcher | Yes | https://www.nexusmods.com/stardewvalley/mods/1915 |
| SpaceCore | Yes | https://www.nexusmods.com/stardewvalley/mods/1348 |
| Farm Type Manager (FTM) | Yes | https://www.nexusmods.com/stardewvalley/mods/3231 |
| Unlockable Bundles | Yes | https://www.nexusmods.com/stardewvalley/mods/17265 |
| Item Extensions | Yes | https://www.nexusmods.com/stardewvalley/mods/20357 |
| MistyCore | Yes | https://www.nexusmods.com/stardewvalley/mods/41330 |
| Generic Mod Config Menu | Optional (for settings) | https://www.nexusmods.com/stardewvalley/mods/5098 |
- The download contains three folders (
[CP], the C# part, and[FTM]). Install all three.
Quick walkthrough
This mod is almost entirely contained within Ginger Island.
The only time-consuming part, if you want to complete everything, is transforming a lot of farm animals.
- Complete the bundles. The temple is in the lower right of the jungle (below the entrance to the gem bird shrine)
- Get Javi to 10 hearts and watch the events
- Collect everything
That’s it.
Progression chart
| Step | What to do | What it unlocks |
|---|---|---|
| 1 | Enter the Volcano Dungeon from Island North | Meeting Javi |
| 2 | Enter the temple from Island East (the jungle) | Temple altar bundles |
| 3 | Complete the fishing altar | Underwater area, Luminous bait / Luminous tackle recipes |
| 4 | Complete the farming altar | The mystery shop in Island Northwest |
| 5 | Complete the mining altar | Elevator to the dragon’s lair, Fire Ring recipe |
| 6 | Complete the cooking and combat altars | 18 cooking recipes, Flame sword |
| 7 | After all five, go to Island South on a sunny day | Group event, Island quarry |
New character “Javi”: schedule, events, and gifts
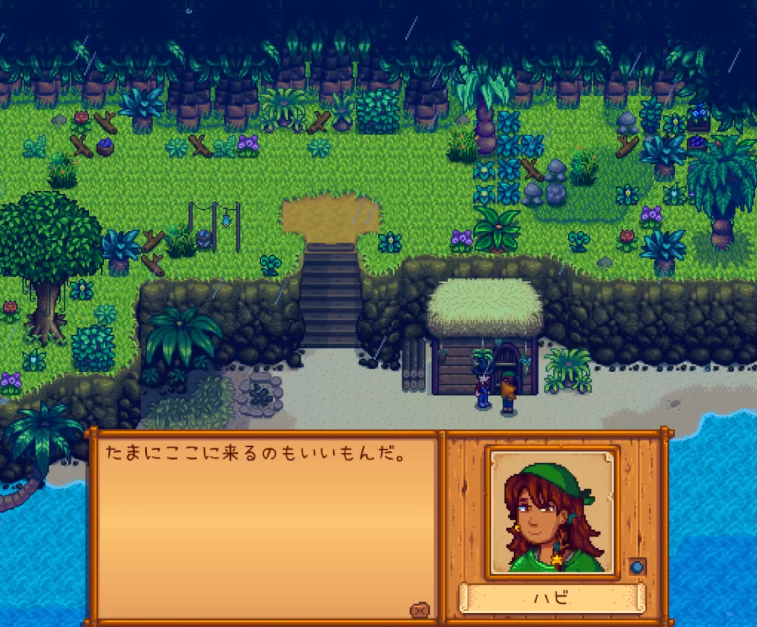
| Item | Details |
|---|---|
| Home | Javi’s hut in Island Southwest |
| Birthday | Winter 21 |
| Marriage | Not possible |
| First meeting | Triggers when you enter the Volcano Dungeon from Island North. Javi is invisible until you meet |
| Entering the hut | 2+ hearts, 7:30 AM–9:00 PM |
Javi’s gift preferences
| Preference | Items |
|---|---|
| Love | Beer, Wine, Mead, Ginger Ale, Piña Colada, Curiosity Lure, Luminous tackle |
| Like | Dressed Spinner, Barbed Hook, Quality Bobber, Truffle, Seafoam Pudding |
| Dislike | Bait |
Rabbit’s Foot also works, so giving high-quality Rabbit’s Feet is the fastest way to raise friendship.
Javi’s schedule
| Day / condition | Location |
|---|---|
| Normal days | Hut in the morning → fishing in Island Southwest from around 10 AM → Island South in the evening → bed at 9 PM |
| Rainy days | Hut, then Leo’s hut in the evening |
| Monday (after repairing the Island Trader) | Island North (in front of the volcano) |
| Wednesday (after repairing the Island North bridge) | Island pond |
| Friday (after cleaning the Island West beach) | Island West |
| Sunday (after completing all altars) | Temple in the evening |
Heart event triggers
| Event | Location | Condition |
|---|---|---|
| First meeting | Volcano Dungeon entrance | Enter the volcano from Island North |
| Temple tour | Island temple | Enter the temple after the first meeting |
| 2 hearts | Pirate Cove | Sunny, after 8 PM, even-numbered day, Beach Resort repaired |
| 4 hearts | Island Southwest | Read the letter that arrives the morning after reaching 4 hearts. Any weather (also triggers in rain) |
| 6 hearts | Pirate Cove | Sunny, after 8 PM, even-numbered day, 4-heart event seen |
| 8 hearts | Javi’s hut | Sunny, 6-heart event seen |
| 10 hearts | Island South | Read the letter that arrives the morning after reaching 10 hearts |
| Ending | Captain’s room (shipwreck in Island West) | Any day after the 10-heart event |
- The 2- and 6-heart events need an even-numbered day, at night, and sunny weather. They are easy to miss
- If you choose “No” to “Read it?” in the 4-heart event, you can still read the rest later at the desk in Javi’s hut
Choice guide (no story spoilers)
The ending branches based on your choices in the 8- and 10-heart events.
There are three choices in the 8-heart event. The second one has no effect.
| Event | Recommended | Avoid |
|---|---|---|
| 8 hearts (1st) | I’m sorry…I shouldn’t have done it. | The other two (friendship drops) |
| 8 hearts (2nd) | Anything | − |
| 8 hearts (3rd) | Anything except “Just get over it.” | He’s not here anymore. Just get over it. (big friendship drop) |
| 10 hearts | You should do it. | It’s a bad idea. |
If you choose “You should do it.” in the 10-heart event, you get the good ending regardless of your 8-heart choices.
Unfortunately, bugs stop you from seeing it to the end
On the bad route, the event freezes in the middle of the conversation with Javi.
Everything stops the moment the music stops, which is a little creepy.
Even on the good route, the 10-heart event freezes partway through the scene with Birdie (around “You should leave.”).
Type
debug ee
into the SMAPI console to end the event.
The next day, going to the shipwreck room (where the golden walnut was) showed the rest of the event, so this seems to be fine.
Sadly, you never get to see the most important part of what Javi says.
- After the good ending, ghosts no longer appear in the sunken ship and underwater, and the underwater monsters change to crabs and squid
- According to the mod data, the “pirate tales” at Pirate Cove (they change by day of the week) also disappear, so read them first if you want to
- If the event freezes, you can quit without saving to retry the day from the morning, but you will just get stuck again, so
debug eeis the only real option
New areas
Until you finish the bundles, the new areas don’t offer much.
Prioritize the bundles first.
There are many areas on the list, but none of them is large.
Roughly: lower right of the jungle, upper left of the farm area, floor 999 of the volcano, right of the Field Office, and beyond the sunken ship.
| Area (in-game name) | How to get there | Unlock condition |
|---|---|---|
| Island southwest | East edge of Island West / west edge of Island South | None |
| Javi’s hut | The house in Island Southwest | Javi 2 hearts, 7:30 AM–9:00 PM |
| Island northwest | North side of Island West | None |
| Island pond | West edge of Island North | None (you can swim) |
| Island quarry | East edge of Island Northwest / west edge of the pond | All altars completed |
| Island temple | Island East (the jungle) | None |
| Island aquarium | Island North | None |
| Sunken ship | Through the back of the shipwreck (captain’s room) in Island West | None |
| Sunken ship hidden room | Door inside the sunken ship | Ancient key |
| Island underwater | Dive from the water in the sunken ship | Fishing altar |
| Lower underwater layer | South edge of the underwater area | Fishing altar |
| Mermaid / Triton house | Lower underwater layer | Give a fish to the giant eel |
| Extinct dragon’s lair | Elevator at the Volcano Dungeon entrance | Mining altar |
Temple altars (5 bundles)
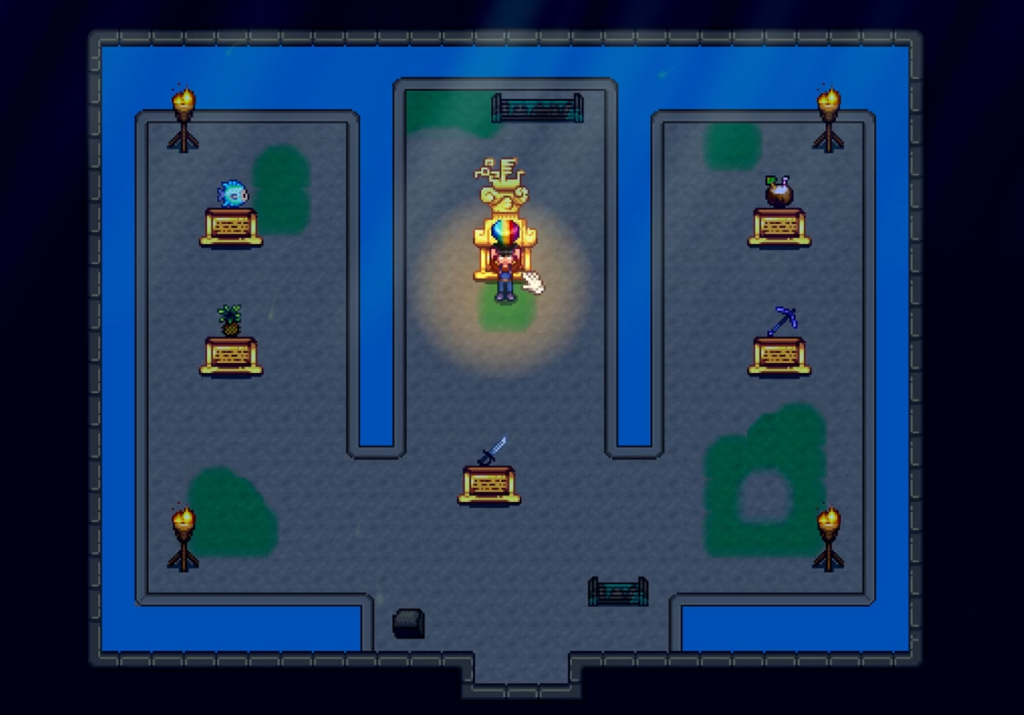
These are the requirements on normal difficulty.
| Altar | Items | Reward | Unlocks |
|---|---|---|---|
| Fishing | Blue Discus, Stingray, Lionfish, Super Cucumber, Pufferfish (1 each) | Luminous bait or Luminous tackle | Diving helmet (lets you dive), Luminous bait / tackle recipes |
| Farming | Banana ×3, Mango ×3, Taro Root ×10, Coconut ×3, Ginger ×10 | Farm Computer or Mini-Shipping Bin | Opens the mystery shop |
| Cooking | Piña Colada, Tropical Curry, Ginger Ale, Banana Pudding, Seafoam Pudding, Truffle Oil ×2 (5 of 6) | Qi Seasoning ×10 | 18 cooking recipes |
| Mining | Dragon Tooth ×3, Cinder Shard ×20, Omni Geode ×5, Iridium Bar ×3, Iridium Ore ×10 | Radioactive Bar ×3 or Radioactive Ore ×15 | Elevator to the dragon’s lair, Fire Ring recipe |
| Combat | Void Essence ×10, Solar Essence ×10, Bat Wing ×50, Slime ×99, Fire essence ×10 (3 of 5) | Flame sword | − |
- The event after completing all altars gives you the furniture “Island Trophy”.
- After that, inspect the inscription in the temple to get a Prismatic Shard (once only).
Aquarium bundles
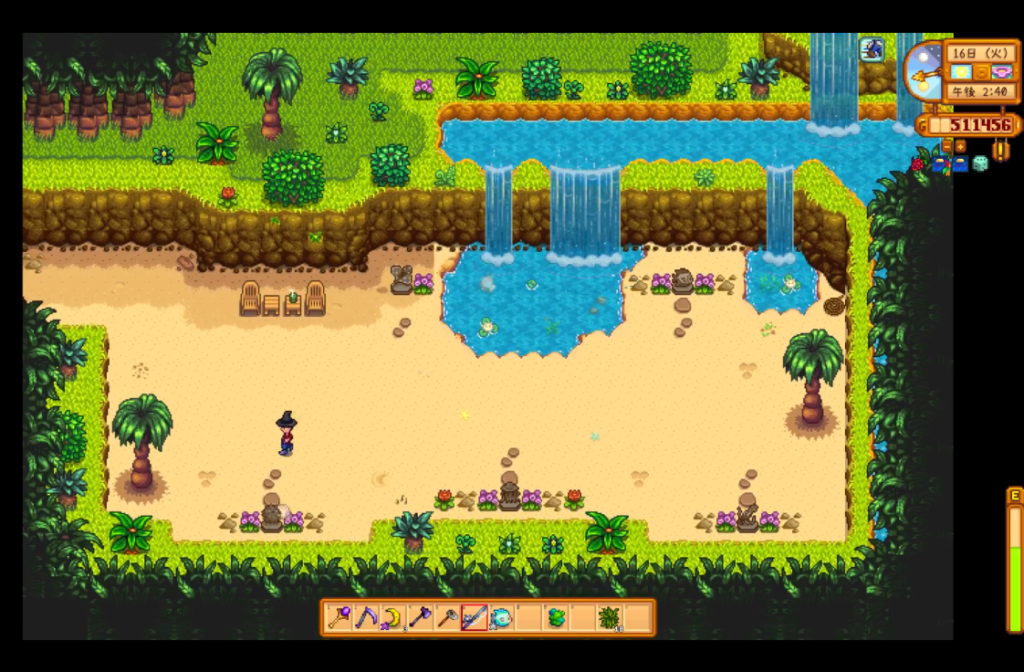
Completing them adds fish tanks to this area.
That’s all.
You donate fish to the five statues in the island aquarium.
On normal difficulty, the fish must be silver quality or better.
| Statue | Fish | Reward |
|---|---|---|
| Pirate Cove | Stingray | Wild Bait ×10 |
| Freshwater | Midnight Carp, Blue Discus | Bait ×10 |
| Ocean (2) | Tilapia, Flounder, Lionfish, Pufferfish | Wild Bait ×10 |
| Ocean (1) | Super Cucumber, Tuna, Octopus | Bait ×10 |
| Deep sea | Atolla Jellyfish, Faceless fish, Cosmic Jellyfish, Harp sponge, Hadal snailfish | Luminous bait ×10 |
- Each completed statue places a fish tank on the spot (it can’t be picked up)
- Completing all five gives no extra reward or event.
Deep sea fish
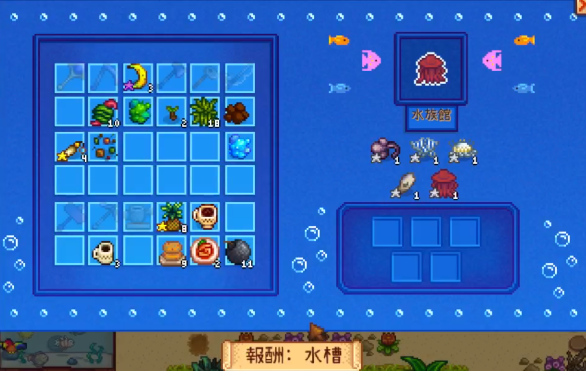
All the deep sea fish for this bundle are caught underwater.
Dive from the sunken ship and go to the lower area (with the bridge and the eel). You can catch all five around the bridge.
Underwater area and how to catch deep sea fish
How to dive
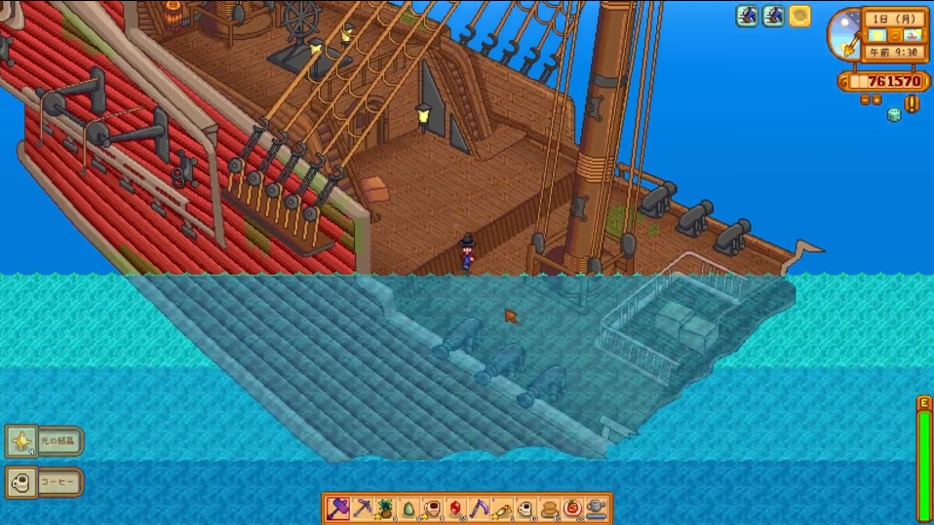
Who would have thought you could go through here…
- Complete the fishing altar (you get the diving helmet)
- Go through the back of the shipwreck in Island West to reach the new area (you can now go right from the golden walnut spot)
- Inspect the water in the lower right of the sunken ship area to dive
- Go to the lower underwater layer from the south edge
How to catch deep sea fish
Deep sea fish can only be caught with this mod’s special items.
Use either one:
- Luminous tackle
- Luminous rod
Luminous bait alone does not work.
With the tackle or the rod, any bait (or no bait) works.
With the Luminous rod, Deluxe Bait seemed to be the fastest.
| Tool | How to get it |
|---|---|
| Luminous tackle | Craft: Iron Bar ×2, Luminous shard ×10 |
| Luminous bait ×25 | Craft: Bait ×20, Luminous shard ×5. Does nothing on its own |
| Luminous rod | Talk to the narwhal statue in the lower underwater layer while holding 99 Luminous shards (once only). Same performance as the Iridium Rod. |
- Luminous shard: break the glowing rocks in the lower underwater layer with a steel pickaxe or better.
- Shards are hard to collect (only a few per week). If you are in a hurry, type
debug item (O)GiEXredux_LumiShard 100into the SMAPI console to get 100.
Giant eel and the mermaid houses
There is a large eel in the lower underwater layer.
Hold a fish and talk to it, then give it one. That’s all.
If you talk to it empty-handed or refuse to give a fish, it bites you.
By the way, the houses this unlocks only give you hints about the underwater area.
Main items found underwater
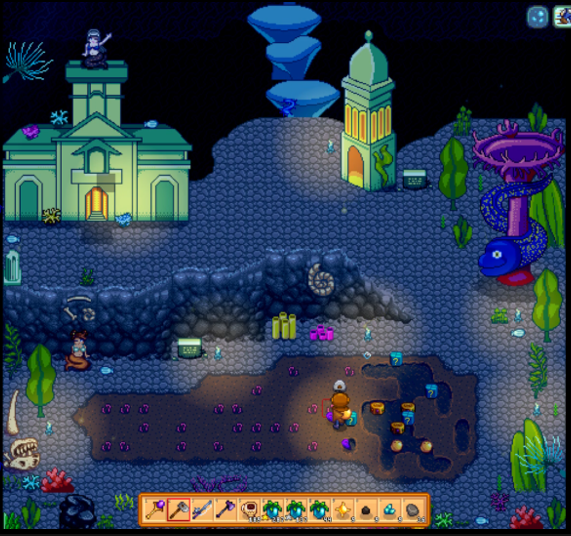
- Artifacts (worm-like objects are the artifact spots)
- Luminous shards
- From fishing: Void shard, Omniscient clam
Artifacts are covered below.
The underwater area has an upper and a lower layer, and the artifacts you can dig up are different in each.
Sunken ship hidden room (Ancient key)
The door at the back of the sunken ship opens if you have an Ancient key.
The key breaks after one use.
Inside there is only a treasure chest. Boo.
Even after opening it once, you need another key to open it again.
| Where to get an Ancient key | Drop rate |
|---|---|
| Artifact spots in the lower underwater layer | High (they spawn daily, recommended) |
| Artifact spots in Island Southwest | Medium |
| Pirate ghosts (monsters in the sunken ship and underwater) | Low (10%) |
The Ancient key can also be donated to the museum, so you need two if you want both, though donating alone is arguably enough.
Extinct dragon’s lair
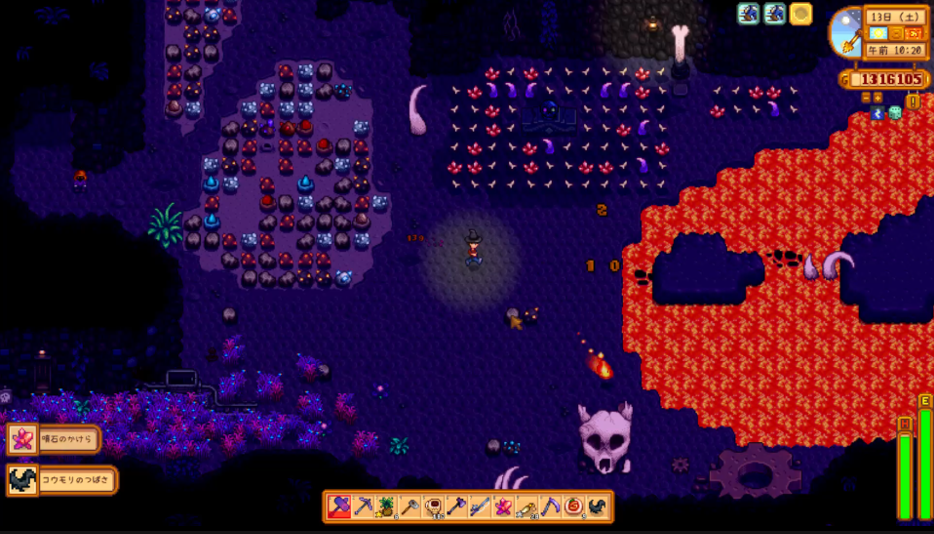
After completing the mining altar, the elevator added to the Volcano Dungeon entrance floor starts working.
Go to floor 999 to reach the dragon’s lair.
- Get the Fire Ring and its recipe from the chest at the back.
- Step on the three floor switches to proceed.
- Magma sprites and lava bats drop Fire essence.
- The dragon-looking monsters drop Lava dragon eggs.
- Dragon Teeth and various ores spawn here.
Mystery shop and crafted items
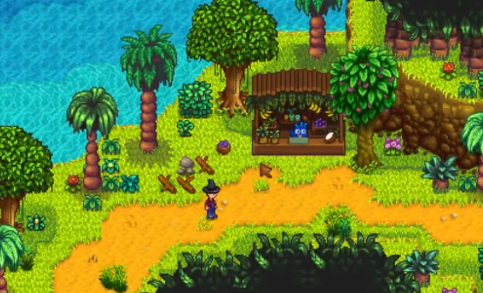
Completing the farming altar opens a shop in Island Northwest.
Follow the path from above the slime area to the west.
Golden Eggs can be bought at Marnie’s shop.
Most items here transform your farm animals so they produce “golden” or “void” animal products.
You need these to complete the shipping collection.
| Item | Price (normal) | Condition |
|---|---|---|
| Gold dust | 100,000g | After Perfection (can be unlocked in the config) |
| Void dust | 50,000g | Always |
| Purifying dust | 25,000g | Always |
| Growing dust | 5,000g | Always |
| Revival dust | 5,000g | Always |
| Huge banana | 1,500g or 3 Bananas | Mon / Tue |
| Huge coconut | 1,500g or 3 Coconuts | Wed / Thu |
| Huge mango | 1,500g or 3 Mangoes | Fri / Sat / Sun |
| Stardrop seeds | 1 Sweet Gem Berry | Friday |
| Iridium egg | 200,000g or 3 Golden Eggs | 28th of each month |
| Auto-Petter | 2 Auto-Grabbers | Rarely in stock |
Crafted items and tools
| Item | Effect | Materials (normal) |
|---|---|---|
| Gold dust | Turns a farm animal into a golden version | Gold Ore ×30, Cinder Shard ×20 |
| Void dust | Turns a farm animal into a void version | Void shard ×2, Void Essence ×10 |
| Purifying dust | Turns a transformed animal back | Luminous shard ×25, Stardrop seeds ×1 |
| Growing dust | Instantly grows a crop to harvestable | Clay ×5, Fiber ×20, Fairy Rose ×1 |
| Revival dust | Revives a dead crop | Clay ×5, Fiber ×20, Purple Mushroom ×1 |
| Huge fruit | Feed to a cow 3 times to turn it into a fruit cow | Shop only |
| Fire Ring | No contact damage from magma sprites, lava bats, etc. Enemy projectiles can’t hit you (does not protect from lava floors) | Gold Bar ×3, Fire essence ×10. Even if you got one from the chest, you must craft it once for the crafting collection |
| Luminous tackle | Lets you catch fish in the lower underwater layer | See “How to catch deep sea fish” |
- Growing dust and Revival dust only work on crops that are in season.
Bug: dust recipes can’t be learned (and the fix)
Buying the dust recipes at the mystery shop does not add them to your crafting menu.
Their descriptions are also the same as the Torch.
This is a bug in Ver.1.5.1 caused by a mismatch in the recipe names.
Type the following into the SMAPI console (the black window that opens with the game) and press Enter to learn the recipes.
debug craftingrecipe GiEXredux_GoldPlaceholder
debug craftingrecipe GiEXredux_VoidPlaceholder
debug craftingrecipe GiEXredux_PurifyPlaceholder
debug craftingrecipe GiEXredux_RevivalPlaceholder
debug craftingrecipe GiEXredux_GrowPlaceholder
The recipes are saved once you save the game (sleep).
New farm animals and animal products
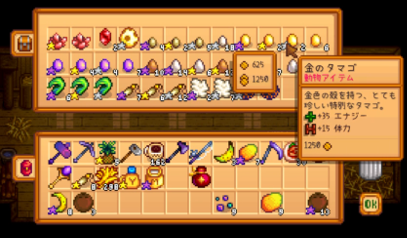
The mod’s animals are created by giving items to your existing animals, such as cows, to transform them.
Using the dusts
Hold the dust and left-click on the animal.
A screen comparing the animal before and after appears. Choose “Yes” to transform it.
Using the huge fruits
Hold the item, left-click on a cow, and choose “Yes” to feed it.
Feed the same cow the same item 3 times and it transforms.
Large milk depends on friendship
Transformation seems to keep the original animal’s friendship, so if you transform an animal at max friendship, you won’t get the regular-size milk and so on.
Using new animals is less error-prone, but their friendship rose very slowly.
Transformation table
| Original animal | Gold dust | Void dust |
|---|---|---|
| Cow | Golden cow | Void cow |
| Goat | Golden goat | Void goat |
| Sheep | Golden sheep | Void sheep |
| Ostrich | Golden ostrich | Void ostrich |
| Dinosaur | Golden dinosaur | Void dinosaur |
| Duck | × (screen freezes, bug) | Void duck |
| Rabbit | − | Void rabbit |
- Chickens and pigs can’t be transformed
- Purifying dust turns them back
Fruit cows
Huge banana, Huge coconut, Huge mango
Feed the same one 3 times in a row and the cow transforms.
Check the mystery shop for how to get them (stock changes by day of the week).
Others
The Iridium chicken and the Lava dragon don’t need artisan goods and don’t produce large eggs, so if you’re going for Perfection, shipping one product each is enough.
Both hatch in an Incubator.
Animals and their products
| Animal | Building | Product | Interval | Processed into |
|---|---|---|---|---|
| Golden cow | Barn | Golden milk | Daily | Cheese ×2 |
| Golden goat | Barn | Golden goat milk | 2 days | Goat Cheese ×2 |
| Golden sheep | Barn | Golden wool | 3 days | Golden yarn |
| Golden ostrich | Barn | Golden ostrich egg | 7 days | Mayonnaise ×10 (gold quality) |
| Golden dinosaur | Coop | Golden dinosaur egg | 7 days | Dinosaur Mayonnaise ×3 (gold quality) |
| Void cow | Barn | Void milk | Daily | Void cheese |
| Void goat | Barn | Void goat milk (regular size becomes an Error Item) | 2 days | Void goat cheese |
| Void sheep | Barn | Void wool | 3 days | Void yarn |
| Void duck | Coop | Void duck egg, feather | 2 days | Void duck mayonnaise |
| Void rabbit | Coop | Void wool, Rabbit’s Foot | 4 days | − |
| Fruit cows | Barn | Banana / Coconut / Mango milk | Daily | Can’t be processed |
| Iridium chicken | Coop | Iridium egg | Daily | Mayonnaise ×4–7 (gold quality) |
| Lava dragon | Coop | Fire Quartz to Fire Opal | 3 days | − |
- The higher the Lava dragon’s friendship, the better its drops: Fire Quartz → Obsidian → Ruby → Fire Opal
- Void ostrich and Void dinosaur lay golden eggs because of a bug
- Each animal type can be turned off in the config
New fish
They didn’t show up in the collections tab.
The island is always summer, so you can catch them in any season.
| Location | Fish | Time |
|---|---|---|
| Island Southwest / Island pond (1) | Coconut fish | 6:00 AM–8:00 PM |
| Sunken ship (1) | Pirate fish | 6:00 AM–2:00 AM |
| Dragon’s lair (4) | Cinderfish, Skeletonfish, Omnifish, Dragonfish (rare) | Cinderfish also bit around noon |
| Lower underwater layer (13) | Sea pig, Atolla Jellyfish, Faceless fish, Vampire squid, Patagonian Toothfish, Comb jelly, Lizard fish, Cusk eel, Grenadier, Flabby Whalefish, Cosmic Jellyfish, Hadal snailfish, Pirate fish | 6:00 AM–2:00 AM |
| Crab pot | Creatures |
|---|---|
| Lower underwater layer (6) | Squidworm, Brittle starfish, Amphipoda, Chiton, Caridea, Harp sponge |
| Dragon’s lair (1) | Lava snail |
- The lower underwater layer requires the Luminous tackle or the Luminous rod mentioned above.
- Atolla Jellyfish and Vampire squid are easier to catch far from the shore, in deep water
- Dragonfish is rare and hard to catch
Cooking
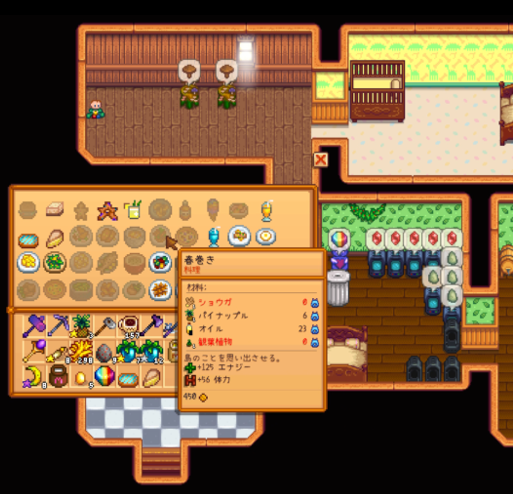
A House Plant…?
Completing the cooking altar teaches you 18 recipes at once.
There are 19 dishes in total (18 from the altar + Gingerbread man).
| Dish | Ingredients | Notes |
|---|---|---|
| Shrimp mango salad | Shrimp ×3, Mango, Ginger, Honey | − |
| Coconut cheesecake bars | Sugar, Egg ×3, Coconut, Wheat Flour | − |
| Gingerbread man | Sugar, Ginger, Wheat Flour, Egg | Learned at 5 hearts with Evelyn |
| Stardrop cake | Stardrop seeds, Wheat Flour, Sugar ×2, Egg ×2 | Buff: restores some energy when you use tools |
| Coconut pineapple spritz | Coconut, Pineapple, Sugar | Makes you tipsy |
| Fried coconut shrimp | Bread, Coconut, Egg ×2, Shrimp ×3, Mayonnaise | − |
| Sweet sauce | Sweet Gem Berry ×2, Sugar | Buff: gifts give a little more friendship. Hated by everyone |
| Magic ice cream | Prismatic Shard ×3, Milk, Sugar | Mining +2, Luck +5, Speed +2, Defense +5, Attack +5. Loved by everyone |
| Mango milk | Mango, Milk | − |
| Ancient juice | Ancient Fruit ×3, Sugar | Sells for 2,000g |
| Ancient cobbler | Ancient Fruit ×5, Sugar, Golden Egg | Sells for 1,500g |
| Pineapple coconut cake | Wheat Flour, Pineapple, Coconut, Egg | Sells for 1,200g |
| Trout with garlic and chanterelle | Rainbow Trout, Chanterelle ×2, Garlic, Oil, Bread | Also a museum reward |
| Tilapia with mango salsa | Sugar, Tilapia, Mango ×2, Hot Pepper, Oil | − |
| Coconut curry fish stew | Coconut, Tilapia, Tomato, Garlic, Ginger | − |
| Egg rolls | Ginger, Pineapple, Oil, House Plant | Needs a House Plant because of a recipe bug |
| Mushroom pizza | Chanterelle, Purple Mushroom, Tomato ×2, Wheat Flour ×2 | Loved by Sam and Shane |
| Salmon with mango citrus salsa | Orange, Salmon, Mango | − |
| Omni burger | Omnifish, Bread | Mining +1, Defense +1 |
The Gingerbread man recipe doesn’t arrive in this mod either
I never received the Gingerbread man recipe.
It is supposed to be learned at 5 hearts with Evelyn,
but if Evelyn was already at 5+ hearts before you installed the mod, it seems you can’t learn it because of a bug.
In that case, type this into the SMAPI console to learn it:
debug cookingrecipe GiEXredux_GingerbreadMan
The same thing happened with Gingerbread man in SVE…
Artifacts and the museum
You get tons of artifacts from the underwater artifact spots (the worm objects) and the glowing rocks.
| Artifact | Main source | Sell price | Use besides the museum |
|---|---|---|---|
| Pearl necklace | Underwater artifact spots | 4,000g | Loved by everyone (neutral for Javi) |
| Omniscient clam | Fishing in the sunken ship (comes fairly quickly). Also in the deep sea area | 2,000g | Sell (can’t be gifted) |
| Gold watch | Underwater artifact spots | 450g | Sell |
| Luminous rose | Glowing rocks | 300g | Sell |
| Ancient tablet | Underwater artifact spots | 150g | Sell |
| Fish flute | Artifact spots in Island West (after the fishing altar). Very rare underwater | 70g | Sell |
| Fossil (2 kinds) | Underwater artifact spots | 60g | Sell |
| Pirate hook | Underwater / Island Southwest artifact spots | 50g | Sell (Javi hates it) |
| Strange scale | Underwater artifact spots | 45g | Sell |
| Ancient key | Underwater / Island Southwest artifact spots | 25g | Key to the sunken ship hidden room |
| Compass | Underwater artifact spots | 25g | Sell |
| Water orb | Underwater artifact spots | 20g | Sell |
| Old bottle | Underwater / Island Southwest artifact spots | 7g | Sell |
- You can’t use a Treasure Totem underwater. You can only dig the spots that spawn naturally
- The Fish flute dropped right away when I used a Treasure Totem in Island West
- They are not used in bundles, cooking, or crafting
| Museum donation | Reward |
|---|---|
| Omniscient clam | Pearl |
| Donate 6 of the mod’s artifacts | “Trout with garlic and chanterelle” ×2 |
Config options
With Generic Mod Config Menu, you can change these in-game.
| Setting | Details |
|---|---|
| Difficulty | Easy / normal / hard, separately for overall, bundles, monsters, and shop prices |
| Gold dust unlock | Whether to limit it to after Perfection (on by default) |
| Lighter backstory | Tones down Javi’s backstory |
| Portrait | Vanilla style, SHIE style, or anime style |
| Animals | Turn each type on or off |
| Perfection | Exclude the mod’s dishes, fish, and animal products from the tracker |
Bugs and notes (Ver.1.5.1)
| Issue | Workaround |
|---|---|
| Buying the dust recipes doesn’t let you craft them | Learn them with the debug commands above |
| Some fish set to appear in the Island pond and elsewhere are missing | Nothing to worry about |
| Viperfish, Sea angel, and Abyssal Spiderfish have no fishing location | Currently unobtainable |
| Two “Revival dust” recipes appear in the crafting menu | One of them (with Fairy Rose) is actually the Growing dust recipe. Crafting it gives Growing dust |
| Javi’s 10-heart event (good route) freezes in the scene with Birdie | End the event with debug ee. The good ending triggers in the captain’s room the next day |
| Javi’s 10-heart event freezes after “It’s a bad idea.” → confirming “Yes” | A typo in the event script. Quit without saving and retry. To see the bad ending, choose “Just get over it.” in the 8-heart event |
| Using Gold dust on a duck freezes the screen (no transformation) | Wrong transformation target in the data. Right-click the duck again to recover. Don’t use it on ducks |
| Void goat’s regular-size milk becomes an Error Item (VoatMilk) | A data mistake. Large milk works fine. |
| Void ostrich and Void dinosaur lay golden eggs | A data mistake. Void dinosaur mayonnaise (shipping collection) can’t be made, so spawn the egg with debug item (O)GiEXredux_DinoEgg_V 1 and put it in a Mayonnaise Machine |
| Talking to the mermaid in the lower right of the Triton house shows “Strings\StringsFromMaps:GiEX.Mermaid2” | Missing dialogue. Doesn’t affect progress |
| Egg rolls require a House Plant | A typo in the recipe. You can make it if you have a House Plant. |
| The Gingerbread man recipe never arrives (Evelyn already at 5+ hearts before installing) | debug cookingrecipe GiEXredux_GingerbreadMan |
| The golden duck egg and void ostrich egg can’t be obtained, so the shipping collection can’t be completed | Spawn them with a command and ship them (see the list below) |
Commands to save time and work around bugs
Type these into the SMAPI console (the black window that opens with the game) and press Enter. All of them were tested in-game.
Required to progress
Things you can’t progress through or obtain normally because of bugs.
| Purpose | Command |
|---|---|
| End a frozen event | debug ee |
| Learn the Gold dust recipe | debug craftingrecipe GiEXredux_GoldPlaceholder |
| Learn the Void dust recipe | debug craftingrecipe GiEXredux_VoidPlaceholder |
| Learn the Purifying dust recipe | debug craftingrecipe GiEXredux_PurifyPlaceholder |
| Learn the Revival dust recipe | debug craftingrecipe GiEXredux_RevivalPlaceholder |
| Learn the Growing dust recipe | debug craftingrecipe GiEXredux_GrowPlaceholder |
| Learn the Gingerbread man recipe | debug cookingrecipe GiEXredux_GingerbreadMan |
| Void dinosaur egg | debug item (O)GiEXredux_DinoEgg_V 1 |
| Golden duck egg | debug item (O)GiEXredux_DuckEgg_G 1 |
| Void ostrich egg | debug item (O)GiEXredux_OstrichEgg_V 1 |
Things that take forever to collect
You can get these normally, but it takes an extremely long time.
Luminous shards in particular come at about 5 per week, so collecting 99 would take about 20 weeks (a year and a season)…
| Purpose | Command |
|---|---|
| 100 Luminous shards | debug item (O)GiEXredux_LumiShard 100 |
| Max friendship for animals in the building | debug befriendanimals (run it inside the barn or coop) |
| 3 Huge coconuts | debug item (T)GiEXredux_HugeCoconut 3 (HugeBanana for banana, HugeMango for mango) |
| Fruit milk | debug item (O)GiEXredux_Milk_B 1 (_C for coconut, _M for mango, LargeMilk_B etc. for large milk) |
- If you don’t know an item ID, search with
list_items <English name>(e.g.list_items milk) - Huge fruits count as tools, so their IDs start with
(T)instead of(O).
My impressions
Sorry to the author, but I can’t recommend this mod.
There are so many bugs that playing it felt unpleasant.
Having to rely on SMAPI cheat commands to progress was very stressful.
On top of that, the only story event couldn’t be watched to the end because of a bug.
Turning animals golden, void, or fruity didn’t feel rewarding either.
I would have preferred the dragon’s lair to be a proper dungeon with more enemies.
A dragon spawns every few minutes, you press three switches, and that’s it? Come on.
All that work on the aquarium bundles just gives you fish tanks…
Well, it’s fine, I guess.
What this mod made me feel most was how polished SVE and RSV are. Bravo!
Summary
The mod is still in development, so I’ll update this page if things change in future versions.
See you.